
Traditional web analytics solutions like Google Analytics come with significant drawbacks: privacy concerns, GDPR compliance issues, slow page loads from third-party scripts, and data ownership challenges. Tinybird offers a privacy-focused alternative that gives you real-time analytics without cookies, runs on your infrastructure, and provides instant insights powered by ClickHouse.
High Quality Starter Kits with built-in authentication flow (Auth.js), object uploads (AWS, Clouflare R2, Firebase Storage, Supabase Storage), integrated payments (Stripe, LemonSqueezy), email verification flow (Resend, Postmark, Sendgrid), and much more. Compatible with any database (Redis, Postgres, MongoDB, SQLite, Firestore).
Get all 3 kits$147$99- Next.js Starter Kit
- SvelteKit Starter Kit
- Astro Starter Kit
One-time license · Lifetime updates
In this guide, you’ll learn how to set up Tinybird with its Web Analytics template and add the tracking script in your Astro application to start collecting real-time metrics.
Prerequisites
You’ll need the following:
- Node.js 20 or later
- A Tinybird account
Set up a Tinybird workspace
First, authenticate with Tinybird and create or select a workspace. Execute the following commands:
# (macOS/Linux) Install Tinybird CLI if you haven't alreadycurl https://tinybird.co | sh
# (Windows) Install Tinybird CLI if you haven't already# powershell -ExecutionPolicy ByPass -c "irm https://tinybird.co | iex"
# Login to Tinybird (opens browser for authentication)tb login
# This will prompt you to select or create a workspace# Choose a region close to your users for best performance
After authentication, you’ll see your available workspaces or be prompted to create a new one. Select the workspace you want to use for analytics.
Deploy the Web Analytics template
Tinybird provides a pre-built template that includes all the data sources, pipes, and endpoints you need. Deploy it with a single command:
# Deploy the Web Analytics template to your workspacetb --cloud deploy \--template https://github.com/tinybirdco/web-analytics-starter-kit/tree/main/tinybird \--allow-destructive-operationsThis command does several things:
- Creates data sources: Sets up the events table to store analytics data
- Deploys transformation pipes: Processes raw events into aggregated metrics
- Creates API endpoints: Exposes SQL queries as REST APIs
- Generates tokens: Creates authentication tokens for ingestion and querying
The deployment completes in a few seconds.
Add tracking script to your Astro layout
Now let’s add the Tinybird tracking script to your Astro application. The script is lightweight (<9KB gzipped), loads asynchronously, and doesn’t block page rendering.
Open the Tinybird console and copy the tracking script using the Copy script green button.
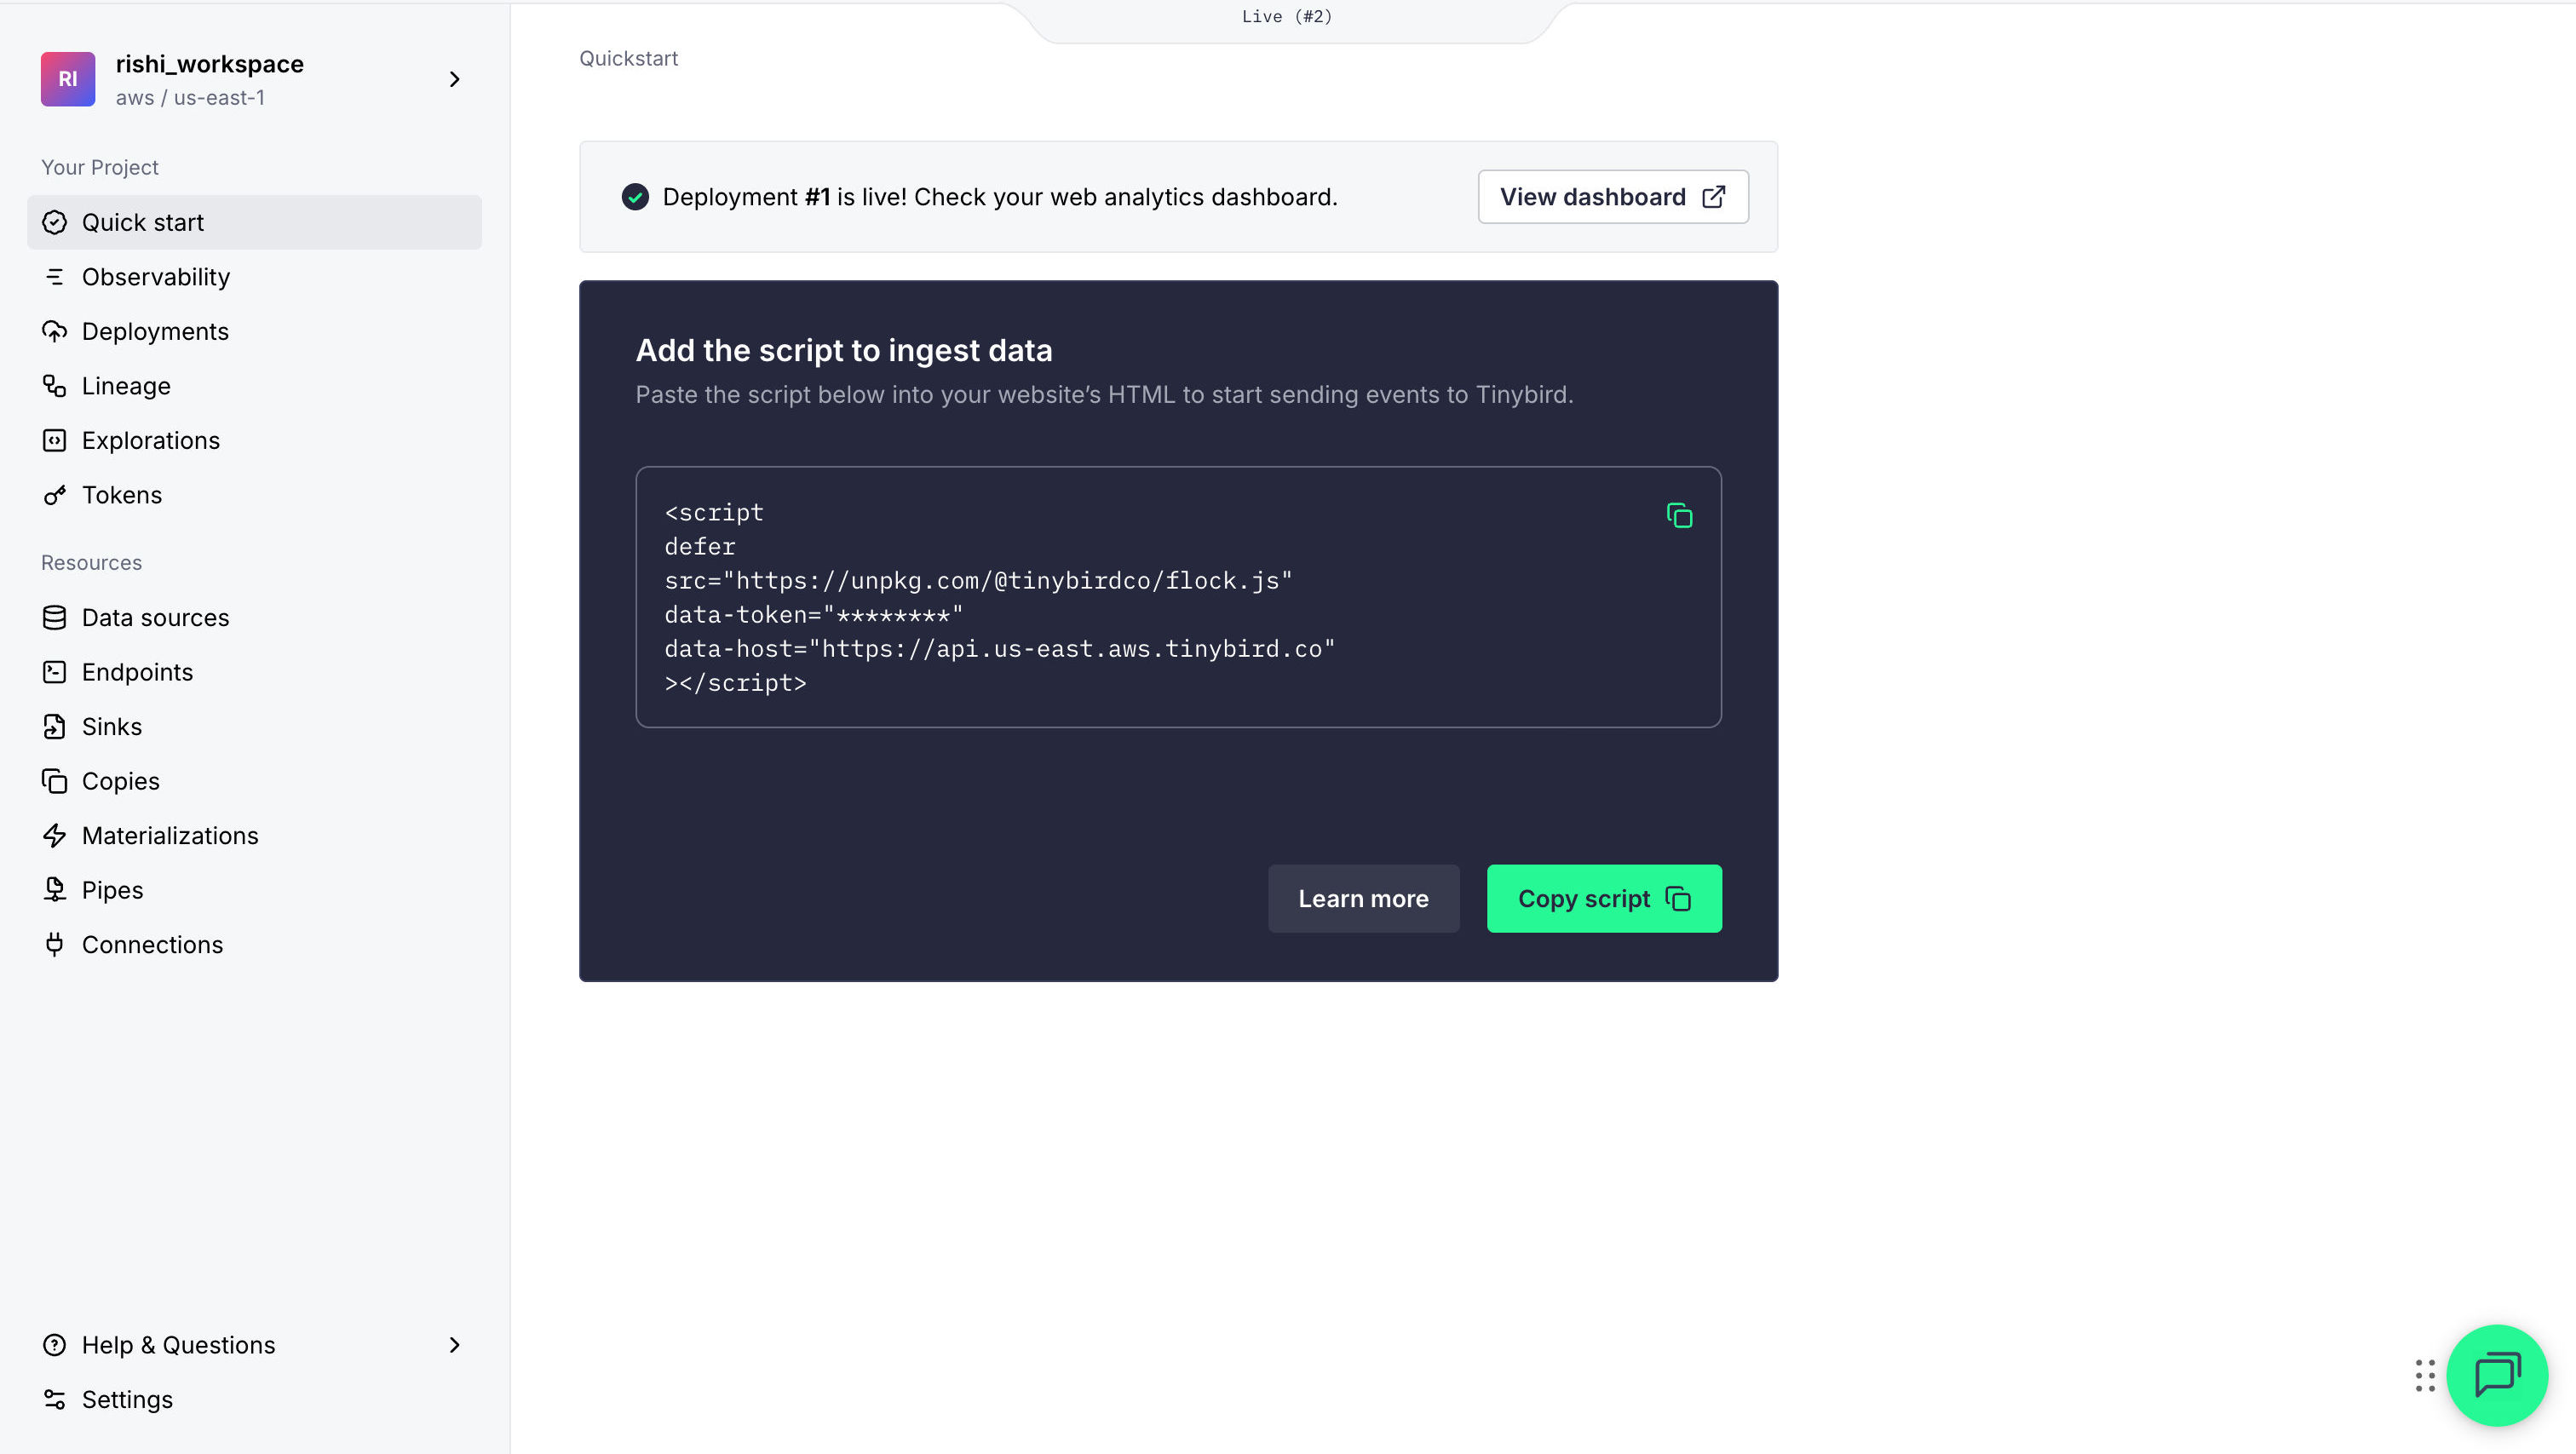
Then, open your main layout file (typically src/layouts/Layout.astro) and add the tracking script in the <head> section:
---// ...---
<!doctype html><html lang="en">  <head>    <meta charset="UTF-8" />    <meta name="viewport" content="width=device-width, initial-scale=1.0" />    <meta name="generator" content={Astro.generator} />    <!-- Tinybird Analytics -->    <script      defer      data-host="https://api.tinybird.co"      src="https://unpkg.com/@tinybirdco/flock.js"      data-token="value-populates-while-copying-from-dashboard"    ></script>  </head>  <body>    <slot />  </body></html>
The defer attribute ensures the script loads asynchronously without blocking page rendering.
View your analytics in the hosted dashboard
Tinybird provides a pre-built analytics dashboard where you can simply enter your dashboard token to view the metrics.
Let’s verify that events are being tracked. Start your Astro development server:
npm run devVisit your site at http://localhost:4321 and navigate between pages. Then check your analytics:
- Open the analytics dashboard (via the View Dashboard button in the console)
- You should see real-time metrics appearing:
- Page views incrementing
- Your location appearing in the map
- Browser and device information
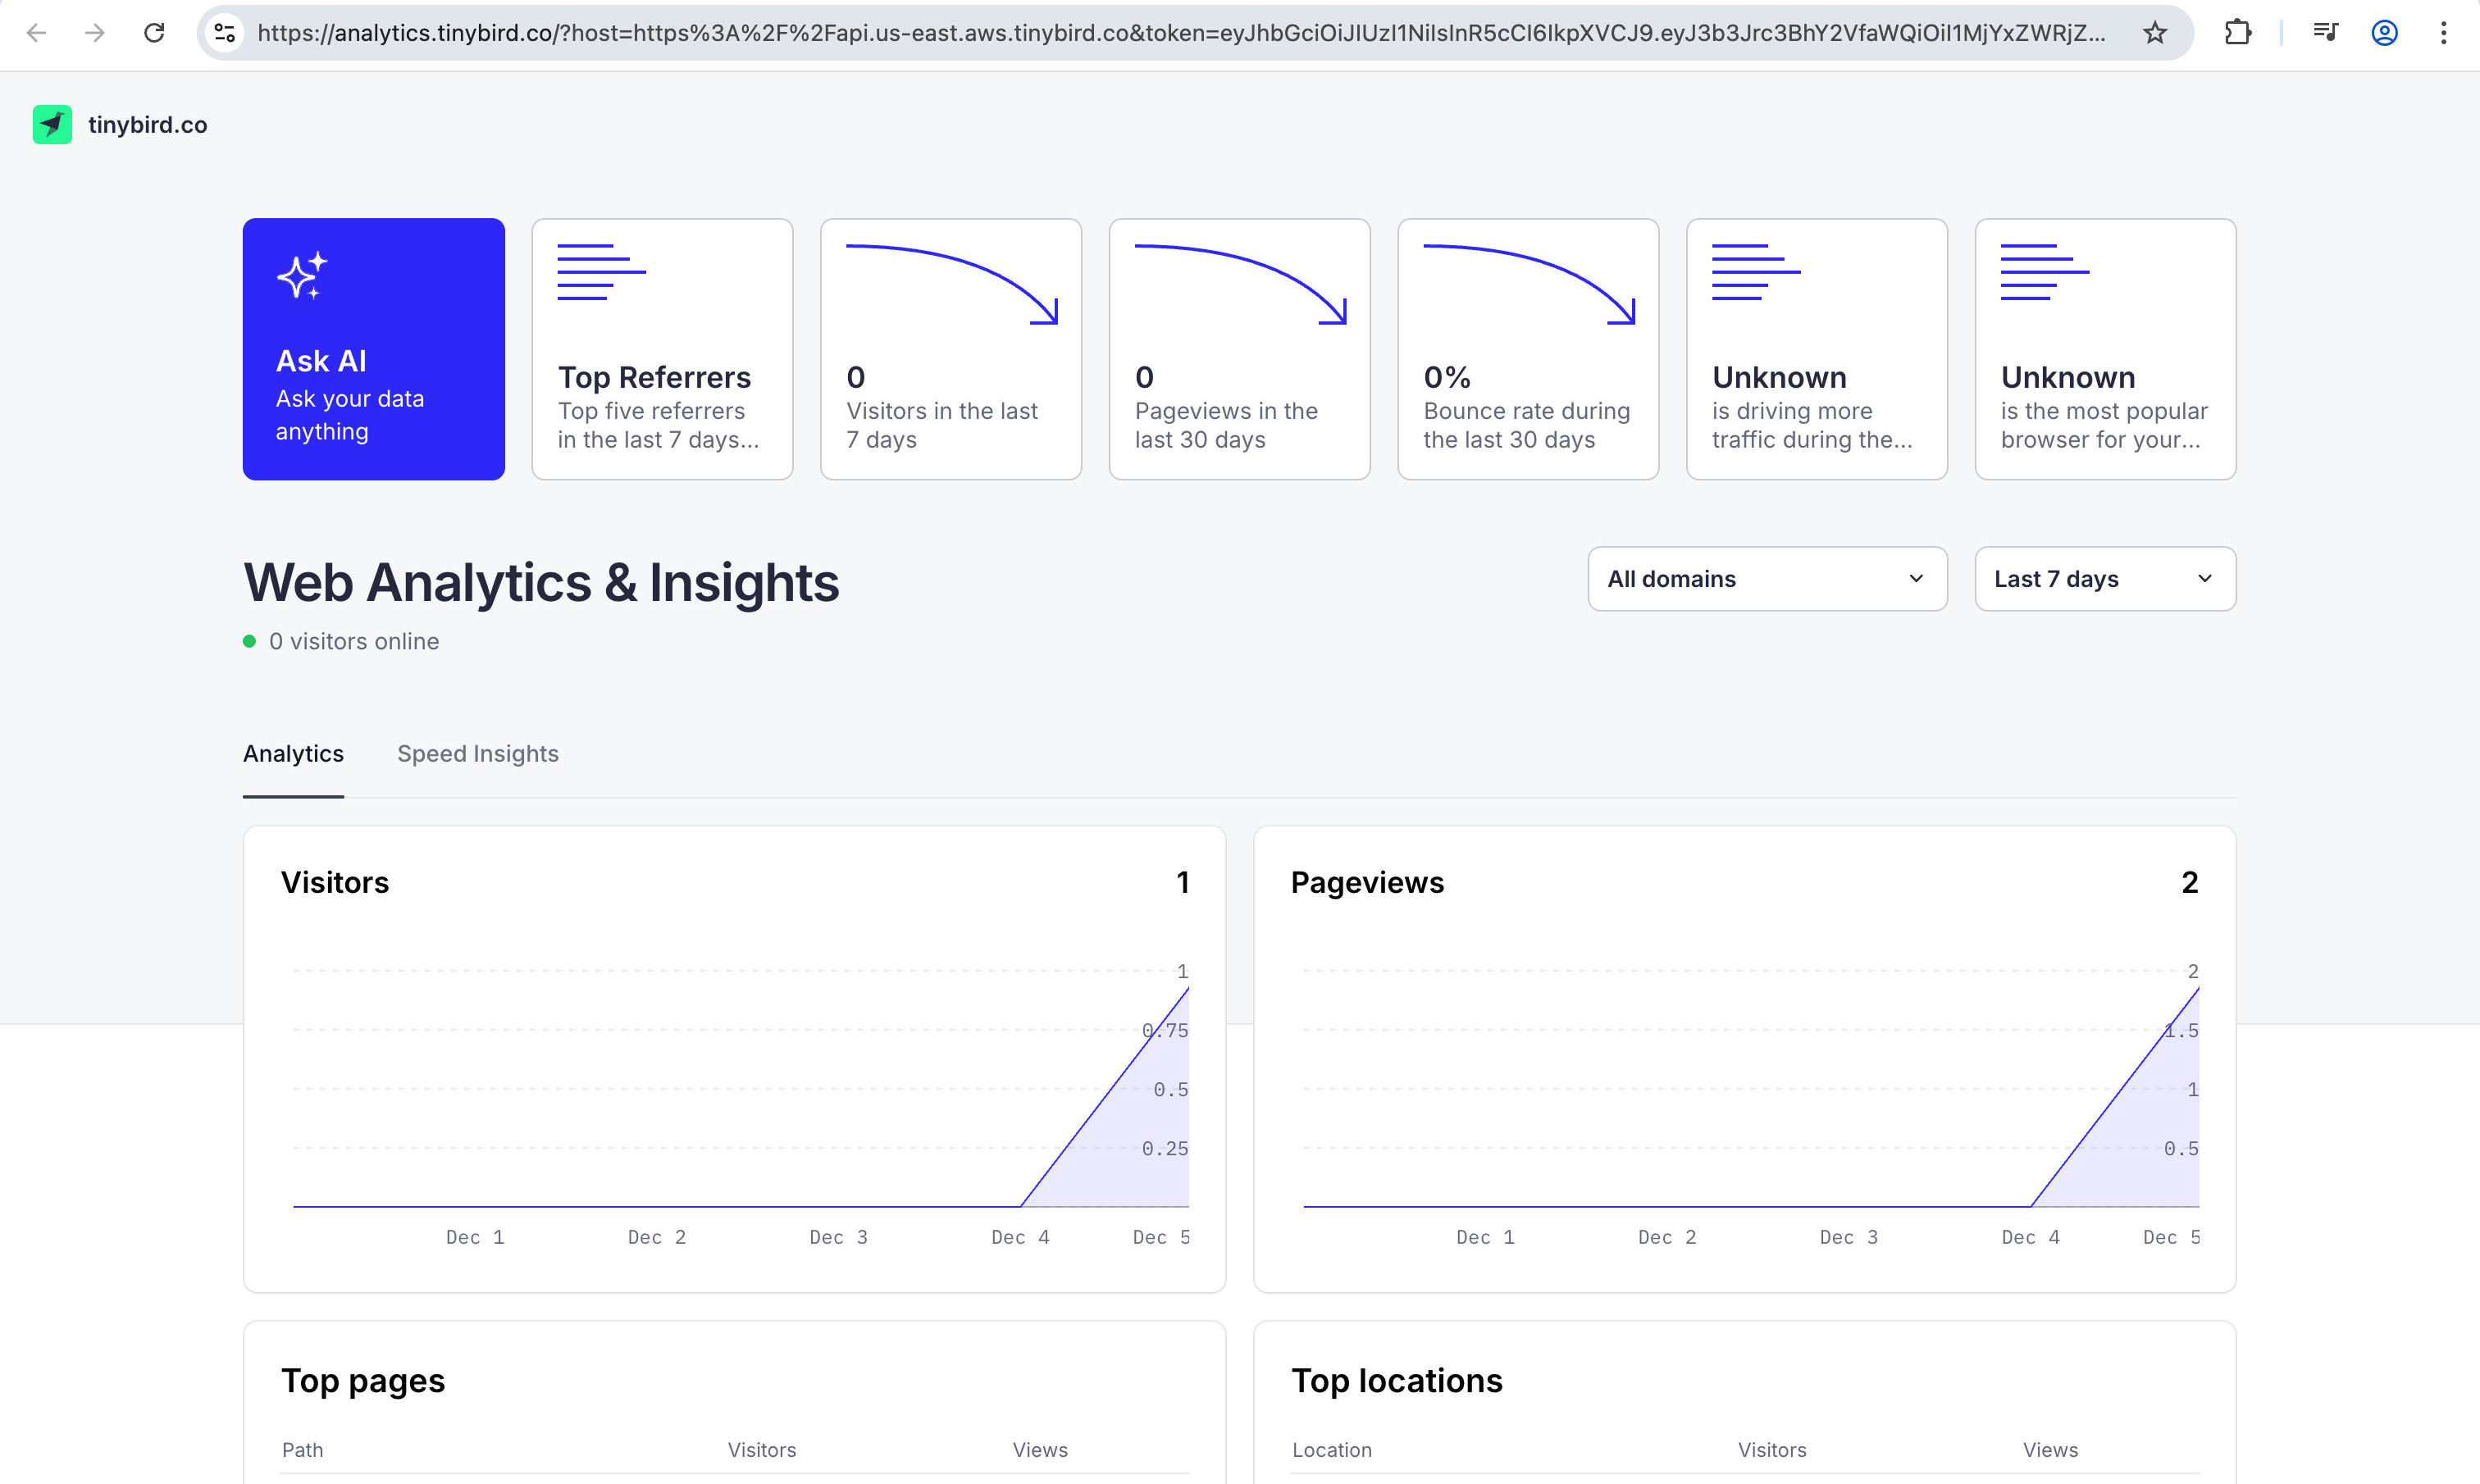
Events are sent immediately and appear in your dashboard within seconds. If you see even a single pageview, you are all set!
Conclusion
You’ve now enabled privacy-first, real-time analytics in your Astro app with Tinybird. It allows you to have page view tracking with no cookies, flexible custom events, and a lightweight script. For advanced use cases or reporting, explore the Tinybird docs.
If you have any questions or comments, feel free to reach out to me on Twitter.